


If you want to learn how to bake sourdough bread at home, this all-inclusive guide will help you make your first loaf, or perfect future loafs so you always have delicious, homemade bread on hand.

During the pandemic, so many people tried their hand at sourdough and I always like to make it known that I was on the homemade sourdough bread train before the world shutdown. My uncle loves making homemade bread and I thought it could be a fun challenge. Once you nail down your sourdough starter (or borrow some from a friend), you’ll be well on your way to delicious loaves on the regular!
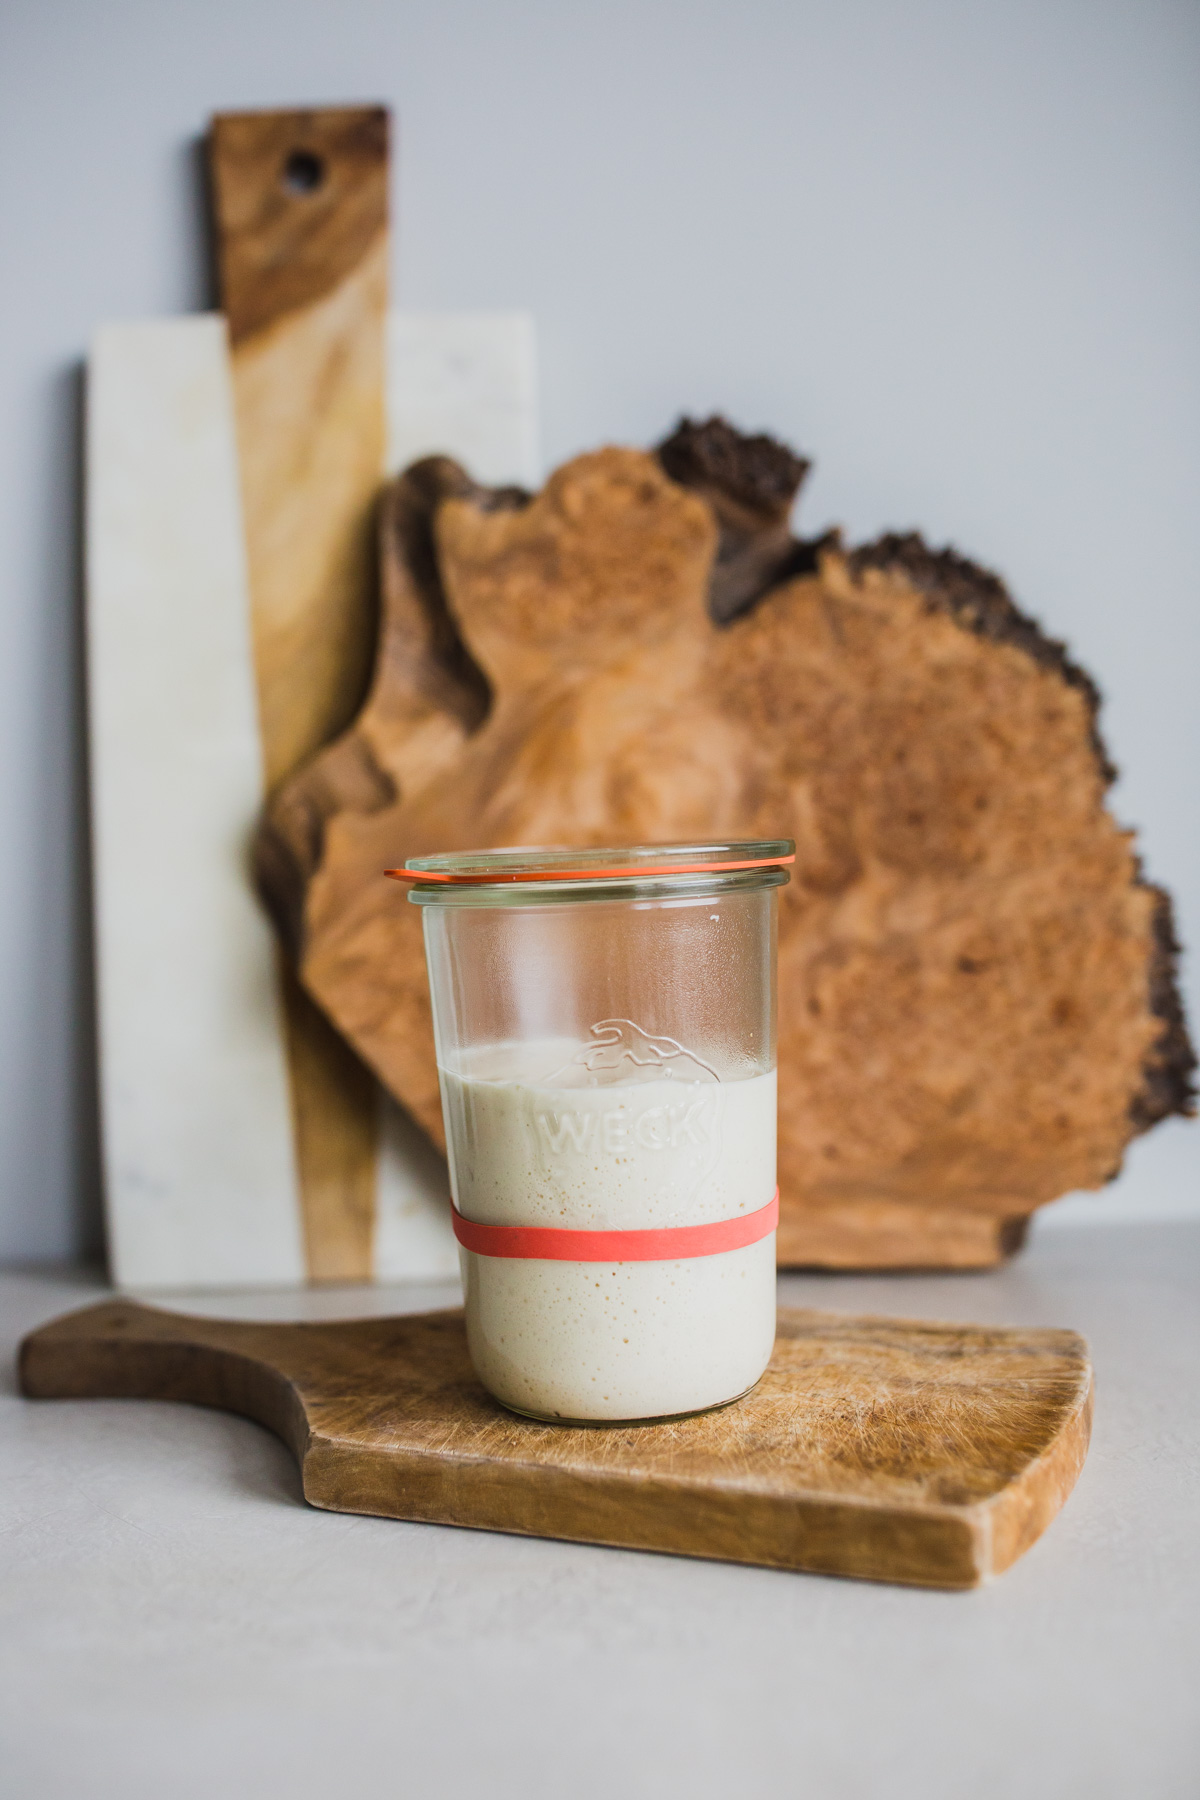
If you’re not familiar with sourdough bread, it’s in a class all its own! Unlike traditional bread that use commercial yeast, the type of yeast that you can buy at the grocery store in the little jar, true artisan bread uses no commercial yeast and relies on the natural yeast that’s within the starter.
Hence the importance of having an active, mature starter for a nice, fluffy, bubbly loaf!
That amazing starter is what creates those characteristic bubbles, tangy flavor and chewy, spongey texture that we all know and love. It makes the best toast, especially avocado toast or simple toast with butter, and amazing sandwiches too! The other perks of having an awesome sourdough starter are that you can use them for other recipes like waffles, pancakes or biscuits in the future. Just add a little bit of the sourdough to your recipe to add some awesome flavor.
Once you have a good active starter, making the bread just gets easier and easier as you become more familiar with how it works and what works best for you. Your environment—climate, temperature & humidity—can all make a difference in how your bread tastes, which is pretty cool and makes sourdough so unique!
Eventually, you may end up with a recipe that’s slightly tweaked from this one and that’s perfectly okay. What’s cool about sourdough is that there really isn’t one perfect recipe. It all depends on your unique environment!
I’ve done a fair amount of bread baking over my 36 years on this earth and I will tell you right now that sourdough bread, while a lot more work, is 100% worth the extra effort. It’s pretty crazy that something as simple as flour and water can create something this delicious!
In my opinion, homemade sourdough is the most flavorful, unique and delicious bread! It’s been such a fun project to make at home, is cheaper than buying it at the store and best of all—makes our family so happy! Both my boys love it and asks for toast all the time!
I’m excited for you guys to try it out and hopefully have a new, fun hobby too! If you’re ready to learn how to bake sourdough bread, keep reading!

How to Bake Sourdough Bread
Before we dive into the actual recipe for how to bake sourdough bread, I wanted to share a few tips and tricks that will help make your sourdough bread great! Making sourdough is not an exact science because there are several factors that will determine how your bread turns out. But paying attention to these things will definitely help you get a great loaf faster!
Weigh Your Ingredients
First off, when you’re measuring ingredients for your recipe, always weigh ingredients. Just scooping them with a cup may not give you the correct measurement. The climate and humidity can change how much flour fits into an actual measuring cup. So weighing it will give you more exact measurements.
I use a kitchen scale like this one. It measures in both grams and ounces and makes it super easy to get consistent bread every time. It’s also small and is easy to store in a drawer or cabinet.
Fold Instead of Knead
Another big difference in making sourdough bread is that you don’t knead it. Well, there is one step at the very beginning where you will knead it for just a bit. But instead of kneading after each rise, you do folds. They’re quite simple and don’t require nearly as much work as kneading.
You simply pull the bread out and fold it once over itself, and boom—that’s a fold. For each set of folds, you’ll do about 4 to 6. This helps strengthen the gluten over time.
Proof Overnight
My first few loaves I did not do an overnight proof in the refrigerator—fail! The overnight proofing allows the bread to develop that amazing sour flavor. It also allows the bread to fully rest before baking. Since adding the overnight proofing step, my bread is consistently lighter, fluffier and has a more sour flavor.
Breaking up the bulk fermentation and baking into two days also makes it a lot easier and less rushed, which equals better bread!
Don’t Rush It
Making sourdough is a labor of love. I always suggest making it on a day when you’ll mostly be at home because the last half of it takes about 6 hours. The actual active time is very little, but you need to be around to do the folds every 30-60 minutes. It’s perfect for a Friday or Saturday afternoon. So you can bake the following Saturday or Sunday morning and enjoy your fresh bread all week long.
Don’t Be Afraid to Try New Things
As you get more comfortable making bread and seeing the results, you’ll start to get a better feel of what makes up your perfect recipe. Crazy enough, things like temperature, climate, humidity can all make a difference in how your bread turns out.

San Francisco is known for their sourdough. And a big reason is because their climate is so perfectly suited for it. It’s wet and humid and foggy. We live in Denver which is basically the complete opposite. I’ve had to test out different ratios to find out what works best here (hint, a little extra water has helped me!)
As you get to know your starter and bread, don’t be afraid to test out different types of flours, different ratios, amounts of water, proofing times, etc. Mixing in different types of flours like whole wheat flour vs. bread flour can give it a totally different flavor and texture.
Bake In a Dutch Oven
The very first recipe I followed did not require a Dutch oven or cloche. You simply put the bread on a pizza stone. I found that this method did not work nearly as well. Having the top on your Dutch oven or cloche helps capture the steam and gives your bread great rise that it doesn’t otherwise get. If you don’t have one, I highly recommend investing in one for the sake of your taste buds.
Dutch ovens are pricy, but a good cast iron one will last you a very long time, and can be used for all kinds of other cooking—soups, stews, sauces and so much more. It’s a kitchen workhorse in my house!
Start Bulk Fermentation Early
When you start, you want to feed the starter first thing in the morning so that you can start the bulk fermentation process early enough. This process takes about 4-6 hours, so you want to make sure that you have plenty of time for all the folds, stretches and rests without rushing it.
This is key for me because I don’t like to stay up too late, ha! I aim to feed my starter by 8:00 am and start the actual dough no later than 1:00 pm.
Let it Cool Completely
This may seem like I’m jumping the gun since you haven’t even baked the bread yet, but it’s important to mention now in case you forget to read the rest of the post after you’re done! You want to make sure that you let your sourdough bread cool for at least 2 hours before slicing. This allows the cooking process to be fully complete before diving in.
If you slice into it too early, it may result in a soggier, squished center, which may taste delicious at first bite, but ends up leaving you with a less than ideal loaf.
What You’ll Need to Bake Sourdough Bread
- active sourdough starter (recipe here)
- Dutch oven with top or baking cloche, I use my Le Creuset
- Banneton bowl and bread lame (this set comes with a razor (bread lame) for slashing bread)
- plastic wrap
- cooling racks
- organic bread flour (I prefer King Arthur)
- organic all-purpose flour (aka, white flour, I prefer King Arthur)
- food scale
- kosher salt
- large mixing bowl
- measuring cups and spoons
I mentioned these items in this post on how to make sourdough starter, but in case you don’t have them yet, here they are again!
Perfect Sourdough Bread Recipe
Sourdough bread is a two-day process, so unless you work or stay at home, this is best done on the weekend when you have the time. Despite being a two-day process, there’s not a lot of hands on work required, it’s more waiting for the bread to rest and rise in between folds. Perfect for a lazy weekend or rainy day!
I’ve included the recipe and an abridged version of the instructions right below, but if this is your first time and you want some more details, scroll below the recipe card for more details instructions at each step, plus a few tips at the end!
Homemade Sourdough Bread
Ingredients
- 270 g sourdough starter (about 1 cup)
- 12 oz bread flour
- 8 oz all-purpose flour
- 2 tsp kosher salt
- 1 1/3 cup filtered water
- extra flour for dusting
Instructions
- Combine all the ingredients in a bowl and mix with a fork until just combined—it won't look pretty yet. Cover with plastic and sit for 30-60 minutes.
- Knead the bread for about 30 seconds to a minute, until it’s more combined and smoother. Once complete, cover again and let sit another 30 minutes.
- With lightly damp hands, pick up dough and lightly stretch (don't tear) and fold over itself, do this 4-6 times. Place back in bowl and cover. Let sit for 45-60 minutes.
- Repeat these folds another 3-4 times, letting the dough rest between each folding round.
- Take your banneton basket and flour it heavily so the dough doesn't stick.
- Take your dough, and pull the edges into the middle, turning every time until you get all the way around, creating a round, smooth side with seams on the other. Once a nice ball has been formed, place it, seam side UP in your basket. Cover with plastic wrap and place in the refrigerator overnight.
- Before baking, preheat oven and Dutch oven to 475 degrees. Once heated, wait another 20-30 minutes to fully heat the Dutch oven.
- Carefully remove Dutch oven and lid and drizzle a little bit of olive oil on the bottom. Over the sink, with a lightly damp hand, flip the dough into one hand, carefully place your dough seam-side down into the Dutch oven. Using a razor or serrated knife, cut 3/4-inch deep slashes to release air, 3-4 will work.
- Place top back on the Dutch oven and put the whole thing in the oven for 20 minutes.
- Remove top and let cook another 10-15 minutes until golden brown on top. If your oven is not super hot, you may need a few more minutes.
- Remove from oven and carefully remove loaf from the Dutch oven and place on a cooling rack.
- Once completely cooled, slice and enjoy!

Instructions, Day 1—Bulk Fermentation
These step by step instructions should help guide you easily through the process of bulk fermentation!
Step 1: Feed the Starter
On day one, I feed the starter first thing in the morning. It takes my starter about 4-6 hours to double in size, once it’s at it’s peak height or just beginning to fall, it’s ready to use. I’ve used it just as soon as it doubles in size too and this produced a great loaf as well, but didn’t get quite as much rise as it did when I waited a little longer.
You’ll know that it’s starting to fall when the middle of the starter has a little depression in it and you can start seeing streaks on the side from where it’s risen and started to fall.
Step 2: Autolyse

Once your starter is ready, combine all the ingredients in a bowl and mix with a fork until just combined. It will look sticky and not smooth, that’s okay. This is called the autolyse period. You’ll cover it with plastic wrap and let it sit for 30 minutes to an hour to let the flour fully absorb the moisture from the water.
Don’t forget to feed the starter that’s leftover to keep it going strong for your next loaf!
I typically try to start this process no later than 1:00 pm so that I don’t have to stay up late doing stretches and folds
Step 3: Knead your Dough

Like I mentioned earlier, this is the only time you’ll actually knead your bread in the traditional sense. But, unlike other breads, this is a very quick knead. You’ll only knead the bread for about 30 seconds to a minute, until it’s more combined and smoother. Once complete, cover again and let sit another 30 minutes.
Step 4: Stretch and Fold
Next up are those stretch and folds I talked about earlier. Instead of kneading, from here on out, you’ll be performing folds. Each time you do this simple process, you’ll do 4-6 folds at a time. You’ll do this every 30-60 minutes.


This stretches the gluten and strengthens the bread and makes the heat throughout more even. Wet your hand lightly and scoop out the dough, fold in half over itself, then turn it 90 degrees and fold it again. For each set of folds, you can fold 4-6 times. You’ll notice after the first few folds that the dough starts getting harder to stretch.
Don’t pull it so far that it rips, you just want to gently fold it. Once your set of folds is done, cover and let sit for 30 minutes.
If you’re having a hard time folding after 30 minutes, your bread needs more time to rest in between folds. Let it rest for 45-60 minutes and then try.
Step 5-9: Repeat Folds
You’ll repeat these sets of folds 5 times. It takes about 4-6 hours to complete the process. By the end, your dough should hold its form better instead of instantly turning into a blob.
Once you’ve completed the final set of folds, you’ll let your dough rest at room temperature for one hour before the final step of the evening.
Step 10: Shape the Dough
Before you shape the dough, get your banneton basket and flour it heavily. Sourdough is a wetter dough than some other breads and you don’t want it to stick to the basket when you try to remove it. You can always dust excess flour off later.
Next, take your dough, and pull the edges into the middle, turning every time until you get all the way around. Then flip it over and with two hands, pull the dough towards you, tucking in the bottom to form a ball. Turn 90 degrees and pull towards you again. You may need to do this once or twice more. Once you have a ball, it’s time to place it in your banneton basket.
Place your dough ball, seam side up in the basket. It will relax a bit, don’t worry about that, and don’t worry that it’s not a perfect tight ball when it goes into the fridge—mine never is.
By the end of the bulk fermentation, your bread will have risen, but you may not notice a major difference in size. When you bake, it will definitely double in size.
Step 11: Proof Overnight

Lastly, cover your dough with plastic wrap and put in the fridge overnight to proof and develop flavor for at least 12 hours and up to 24 hours before baking.
Instructions, Day 2—Bake Day
Step 1: Preheat
Place your Dutch oven or baking cloche with lid on in the oven on the second to lowest rack. If you know your oven gets really hot, place a baking sheet on the lowest rack to help keep the bottom from browning too much.
Preheat oven to 475 degrees. Once it’s pre-heated, wait another 30 minutes to make sure the oven and Dutch oven or cloche are very hot too.
Step 2: Bake Bread
Remove your Dutch oven or cloche from the oven and remove the lid, rub one teaspoon of olive oil on the bottom of the pan.
Gently, flip your bread out of the basket. I put my clean hand on the bottom of the bread and over the sink, flip it over. This will save you some clean up time because of all the excess flour.
Carefully, place your dough, seam-side down, in the Dutch oven or cloche. Be careful not to touch the sides because it’s very hot!
Step 3: Slash the Top
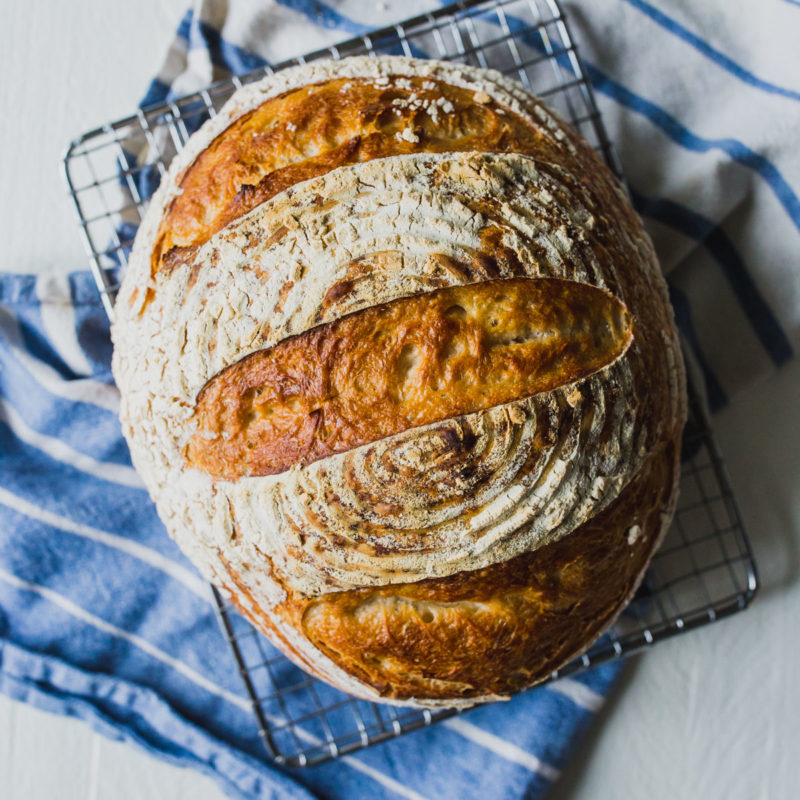
Take your baker’s lame or a serrated knife and slash the top of your dough with a few cuts that are about 1/2-3/4 inch deep—doesn’t have to be exact, but I’ve found that deeper is better than too shallow.
These cuts allow the air to escape and give your bread a beautiful shape. It also gives you that beautiful design on top. If you skip this step, your bread will create it’s own pathway for air to escape and will most likely leave you with a misshapen loaf.
I typically do 3 to 4 cuts on top. You can great really creative with your design, but it isn’t necessary, a simple criss-cross design or a few straight lines will do! Here I did 3 straight lines.
Step 4: Bake with Lid On
Before your bread goes into the preheated oven, use oven mitts and place the top on your Dutch oven or cloche and then place it in the oven.
Bake with the lid on for 20 minutes.
Step 5: Remove Lid & Continue Baking
After 20 minutes, remove the lid from your Dutch oven or cloche. At this point, your bread will be considerably fluffier and look more like a real loaf! It won’t be browned or cooked looking though.
Continue to bake for another 15 minutes. I will sometimes let it go 20 minutes if it’s not browned and crispy enough just yet. The internal temperature should read 208 degrees Fahrenheit if you want to test it. It’s not necessary, but if you’re concerned with whether it’s done or not, this is a good test.
If your bread isn’t browned by the end of cooking, add an additional 5 minutes and keep a careful watch on it. Typically, I’ve never gone past 45 minutes, and 45 minutes was a little too brown and crispy for my oven.
Step 6: Remove from Dutch Oven & Cool

Once you’ve baked your bread, you’ll carefully remove it from the Dutch oven or cloche. I use a wooden flat spatula and oven mitts to get it out without burning myself.
Place your finished loaf on a cooling rack and let it cool completely, about two hours before slicing. I know it’s tempting to cut into it immediately, but letting it cool completely is essential to a perfect loaf!

Troubleshooting
My Bread Didn’t Rise
I found this to be more common at the beginning and I think it’s because my starter simply wasn’t as active and mature. You can still bake a loaf early on, and I suggest you try! Maybe yours will produce a nice fluffy loaf right out of the gate!
If your starter is mature, a flat, dense loaf might mean that you used your starter too late, after it’s peak. Next time, try shortening the time you let your starter rise before using it.
My Bread is Still Doughy in the Middle and Didn’t Get Very Brown
Your oven may not be hot enough. I’d suggest buying an oven safe thermometer like this one that tells the ACTUAL temperature of your oven. Some ovens run hotter or cooler than others and this can help gauge the actual temperature for future loaves.
If the temperature is okay, you might need a longer bake time. Make sure your oven is fully pre-heated and that you give it that extra 30 minutes to fully heat everything in the oven.
My Bread is Very Dry & Difficult to Work With
You may need more water in your recipe. If you live in a drier climate, adding even a few tablespoons to 1/4 cup of water more may make all the difference in how your loaf turns out!
My Dough is Very Wet and Hard to Work With
Having a dough that’s too wet can be just as troublesome. I had this problem with a few first loaves. They had some great bubbles within, but it didn’t get a great rise and was very hard to work with because it never formed a tight enough ball.
If this is happening to you, reduce the amount of water by a few tablespoons on your next loaf to see if it helps.
My Sourdough Isn’t That Sour
When first learning how to bake sourdough bread, we’re all looking for that amazing flavor and stretchy dough. What I’ve found is that it simply comes with time. The older my starter has gotten, the better flavor. To get more flavorful sourdough early on, use some rye flour or another whole grain flour to build that flavor more quickly. I plan on trying rye flour as soon as I can get my hands on some!
You may not get a perfect loaf the first time, or even the fourth time, but each time you bake a new loaf, you’ll get better and learn more. Each time I bake another loaf, I feel like I’m getting better and better at understanding how it all works! The more often you bake, the easier it is to understand your starter and to be able to effectively tailor your recipe or methods to get a perfect loaf.
At the end of the day, it is so much fun and such a wonderful treat to share with your family and friends! Who doesn’t love getting a loaf of delicious, freshly baked bread from their neighbor?!
Okay, I hope this helped you learn how to bake sourdough bread on your own. If you try this out, I would love to see pictures of how your bread turns out, so please tag me on Instagram if you share! And, if you have any questions I didn’t answer, please leave them in the comments below so every one can benefit!
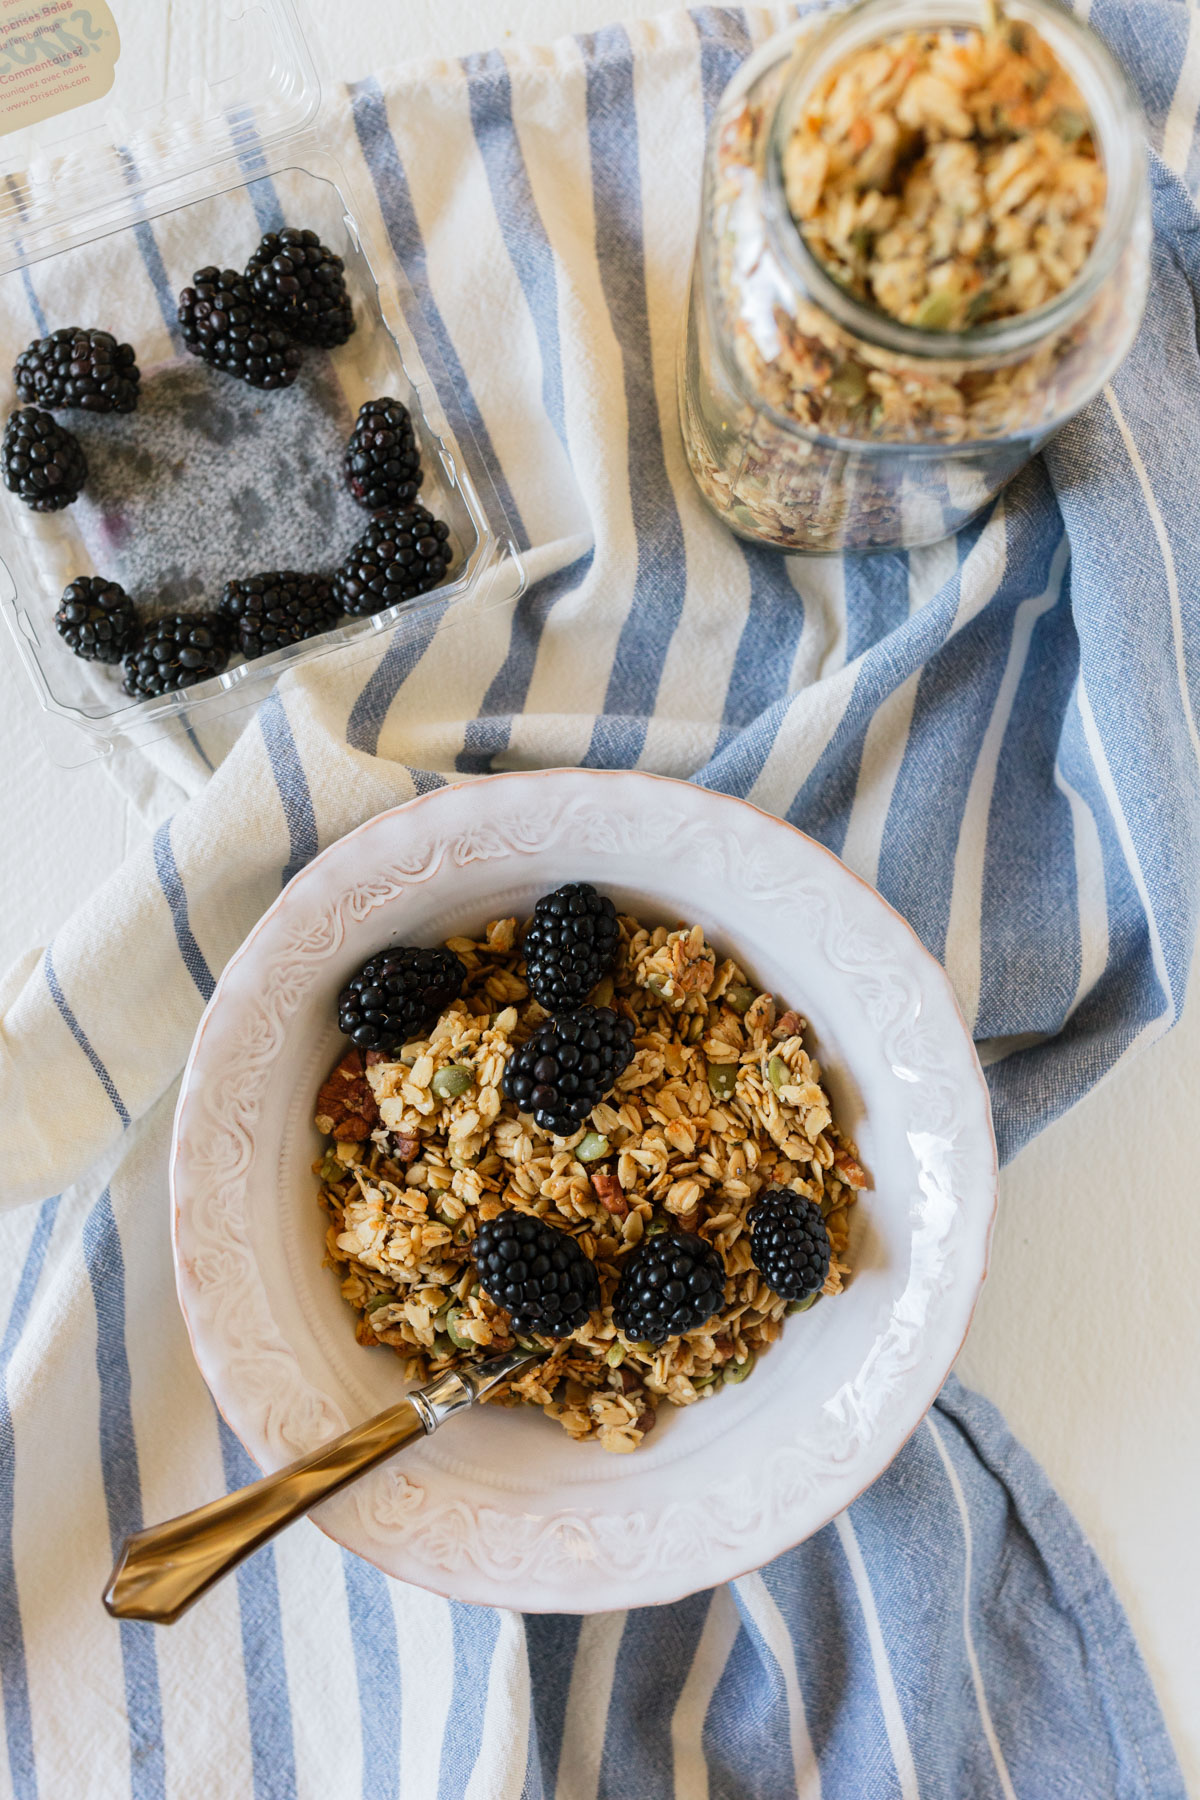
BTW, how to make sourdough bread starter, and healthy homemade granola.
Want to remember this sourdough bread recipe? Pin the images below to save!


You must be logged in to post a comment.